
[et_social_share_custom]
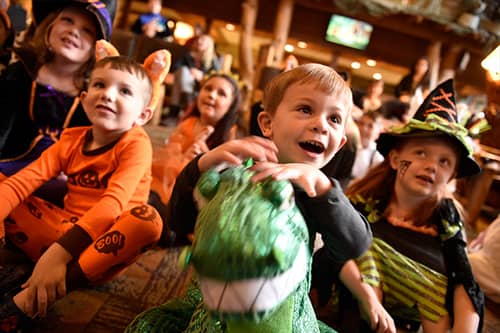
This year Halloween may look a little different, but we’re hosting a safe Howl-O-Ween at the lodge so your family doesn’t have to miss out on any fun. Because we’re experts in fun family time, we’ve come up with a list of our favorite Halloween activities for you to do at home as well.
To get in the spirit, here are 6 great ideas to get the whole family excited to celebrate. Don’t forget to book your October stay now to experience Great Wolf Lodge like never before.
Treats Not Tricks
1. Worms in the Graveyard
About 20 minutes
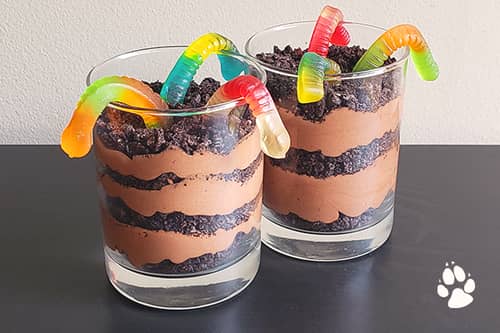
This tasty treat is fun to make and perfectly spooky for a Halloween party at home with the family!
Materials Needed:
- Crushed Chocolate Sandwich Cookies
- Chocolate Pudding
- Whipped Cream
- Gummy Worms
- Small Bowl
- Clear Plastic Cups
Step 1: Make your chocolate pudding in a small bowl.
Step 2: Add whipped cream and mix until you’re left with a light brown color. Set aside.
Step 3: Line the bottom of your plastic cup with a layer of crushed chocolate sandwich cookies.
Step 4: Pour a layer of your pudding mix on top. Then, add another layer of your crushed cookie mix, and another layer of pudding mix. Throw on one final layer of cookies and refrigerate until ready to serve.
Step 5: Complete the presentation by adding a few gummy worms to the top of the glass.
Frightfully Fantastic Crafts
2. Great Wolf Lodge Inspired Wolf Mask & Tails
Over an hour
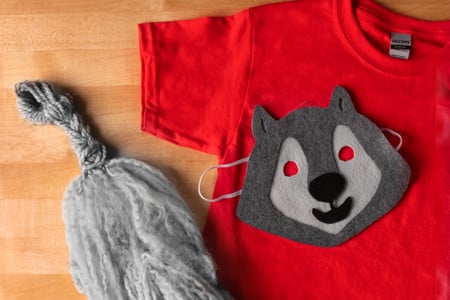
There’s no better way to get ready for Howl-O Ween than by creating your very own wolf mask. Watch our fun video to also make a tail. Once they’re complete, make sure to practice your howl! You’ll fit right into our pack.
Materials Needed:
- 3 Sheets Felt
- 4 Templates
- Marking Pencil
- Sharp Blade or Scissors
- Cotton Elastic
- Glue
- 2 Rolls of Yarn
- Hairbrush
- Hair Iron
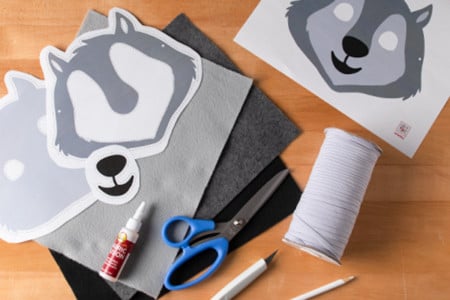
Step 1: Print out the templates linked below. For toddler sizes, click “fit to page” before printing.
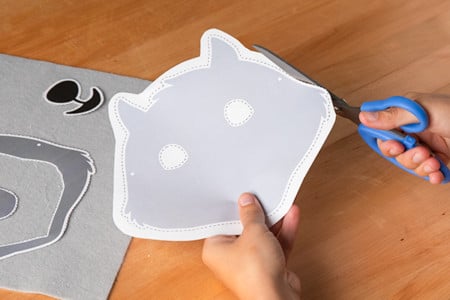
Step 2: Cut out the sections provided by the template.
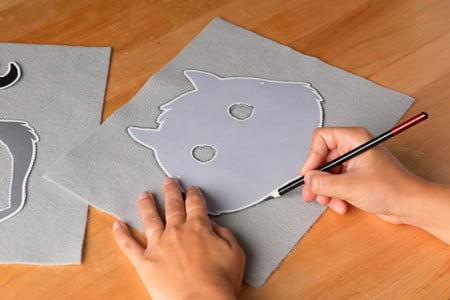
Step 3: Trace each piece onto whatever color of felt you want to use.
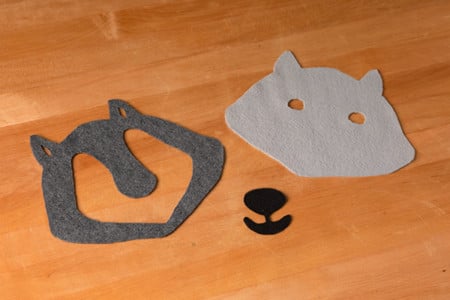
Step 4: Carefully cut out and assemble the layers.
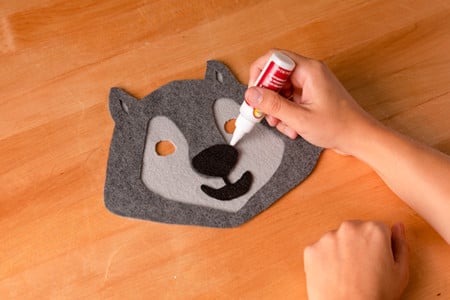
Step 5: Glue all your pieces together.
Step 6: Put your mask aside. Gather the rest of your materials including a scissors, yarn, hairbrush and hair iron.

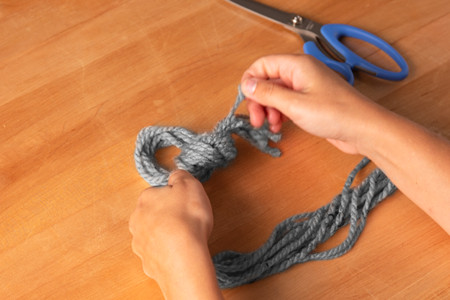
Step 7: Bunch the yarn together and a tie a knot at the top. Make sure not to tighten it all the way so that you can create a small loop and easily attach to clothing.
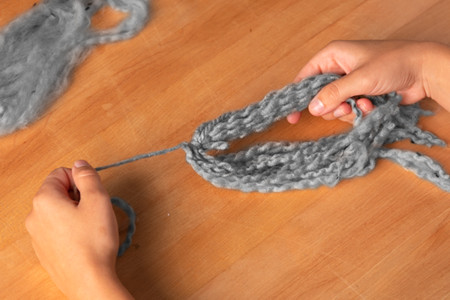
Step 8: Pull at each string of yarn to separate the material.
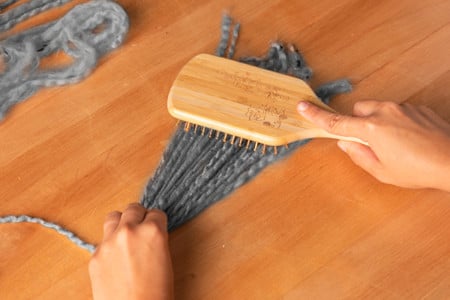
Step 9: Brush out the material.
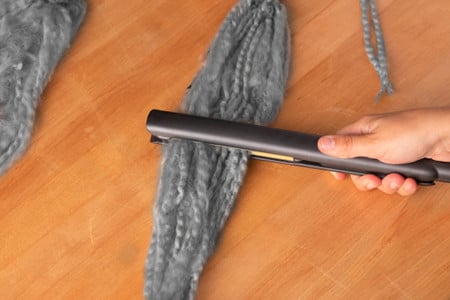
Step 10: Straighten the material using a hair iron.
Step 11: Take an elastic and make earloops for your mask. Get into costume and howl away!
3. Mummy Mason Jar Luminaries
About 10 minutes
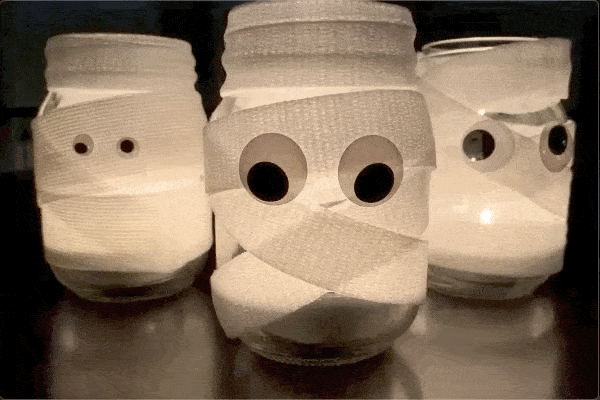
These mummy mason jar luminaries are scary cute and easy to make with the kids!
Materials Needed:
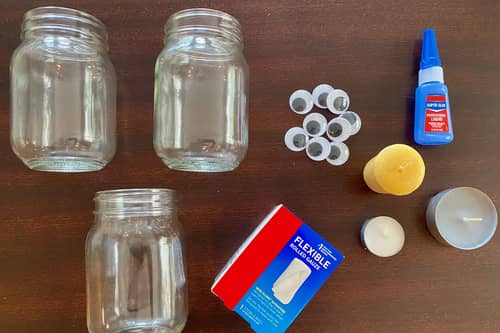
- Mason Jars
- Googly Eyes
- Glue Gun or Fast-Drying Glue
- Flameless Votives or Small Candles
- Gauze Bandage Tape
Step 1: Take the gauze bandage tape and wrap it around your mason jar.
Step 2: Glue on a pair of googly eyes.
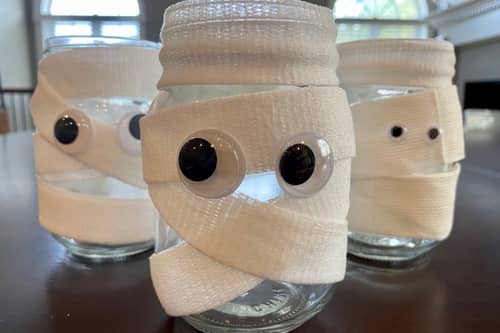
Step 3: Add a flameless votive candle and enjoy!
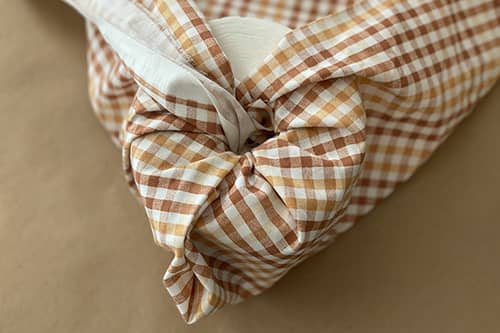
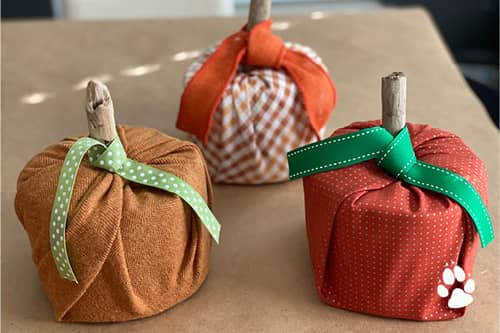
4. Toilet Paper Pumpkins
About 10 minutes
If you happen to have extra toilet paper at home ehhh hmmmm put it to use with this super easy Halloween craft!
Materials Needed:
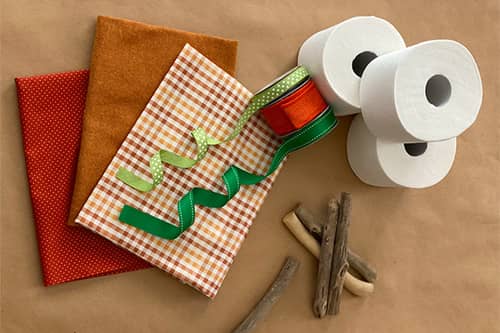
- Full Rolls of Toilet Paper
- Decorative Fabric
- Sticks
- Ribbons
Step 1: Select 3 coordinating fabrics. You’ll need about ¾ of a yard of fabric to wrap each pumpkin.
Tip from our pack: Keep the patterns on the fabric relatively small and simple – plaids, polka dots, and textures work well. Remember that the fabric will gather, so if the pattern is really busy, it’s going to get distorted when it’s all wrapped up.
Step 2: Center the full roll of toilet paper in the middle of the fabric.
Step 3: Gather the fabric by starting at one corner and tucking into the center of the tube. Continue to work your way around gathering and tucking the fabric until the entire roll of toilet paper is covered.
Tip from our pack: If you are using thicker fabric, you might need to cut off the corners of the fabric so that it will all fit into the tube.
Step 4: Gather some thick sticks and place them in the center of the toilet paper tube. Be sure to leave out enough to be visible.
Tip from our pack: Watch out for 4-legged “helpers” who might try to play fetch and dash away with your sticks!

Step 5: Find some decorative ribbons and tie them around the sticks to make the leaves on the pumpkins.
5. Creepy Glowing Eyes
About 10 minutes
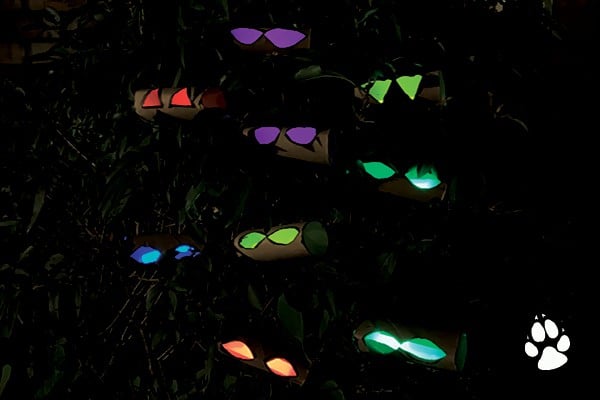
These clever Halloween decorations are simple to make and are sure to brew up some frightful fun in your neighborhood.
Materials Needed:
- Toilet Paper Rolls
- Glow Sticks
- Utility Knife or Scissors
- Tape
- Pen
Step 1: Draw a pair of eyes on your toilet paper roll. Don’t be afraid to get creative and stencil in unusual shapes!
Step 2: Cut out your creepy eye shapes from the toilet paper rolls.
Step 3: Insert a glow stick into the toilet paper rolls and cover the ends with duct tape. Place them in
a bush or a dark place in your yard for spooky Halloween décor.
6. Eerie Exploding Jack-O’-Lantern
Over an hour
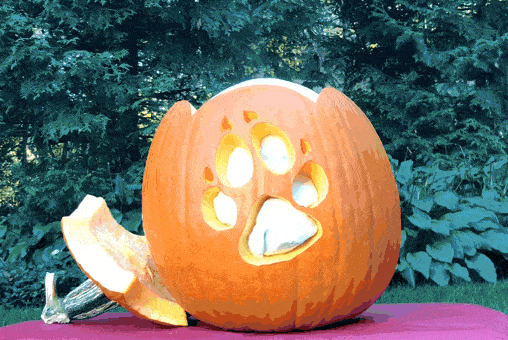
This STEM experiment is not only frightful foamy fun, it’s also a great way to sneak in a science learning opportunity your kiddos will love! Adults, get ready because you’ll have to take the lead with this activity.
Make sure to adjust your recipe ratio based on your pumpkin size, too. We suggest doubling the amount used in this science experiment if you use a pumpkin larger than 10 inches. Now, let’s get started!
Materials Needed:
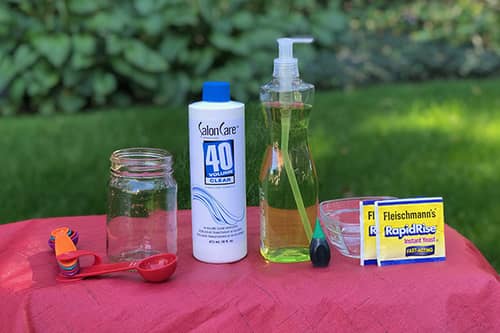
- 1 Cup of Hydrogen Peroxide
- Two Packets of Dry Yeast (one packet is approximately 1/4 oz)
- 6 Tablespoons Warm Water
- Food Coloring
- Cylinder (at least 500 ml). Or you can use a flask that fits your liquid.
- 2 Tablespoons of Dish Soap (any will do)
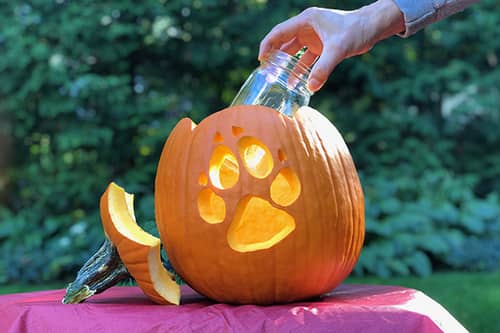
- A Pumpkin to carve into a Jack O’ Lantern. Simple paw or design so the foam can go through easily.
- Funnel
- Safety Goggles
Step 1: Carve your pumpkin Jack O’ Lantern. Remember, adults do the carving!
Step 2: Add the cylinder inside the pumpkin. Have an adult pour the hydrogen peroxide into the cylinder.
Step 3: Ask the kids to add 2 tablespoon of dish soap into the cylinder.
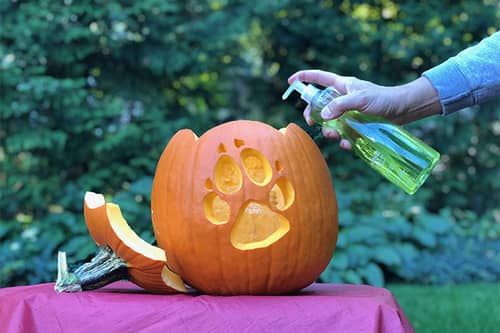
Step 4: Add several drops of food coloring. We used green but you can use any color.
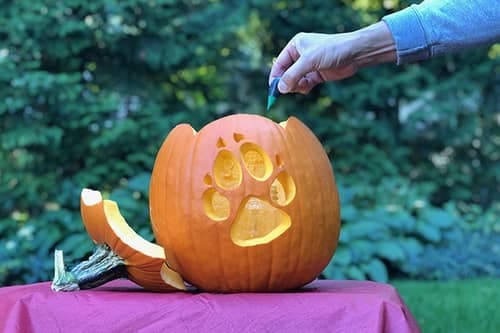
Step 5: Empty your yeast into a bowl and add warm water. Mix well with a fork for 30 seconds.
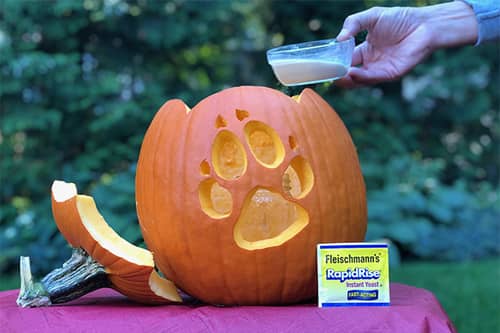
Step 6: Pour the yeast into the cylinder, step back and watch the foamy magic happen! Be careful not to touch the foam. It’s a product of an exothermic reaction which means it will be extremely hot! After several minutes, it will cool down.

Step 7: When you are done, simply rinse out all ingredients in the sink since they are safe to drain.
We hope you enjoyed our list of Halloween activities. You can always count on Great Wolf Lodge to help get you into the holiday spirit, even during the spooky season! Don’t forget to celebrate with us at the lodge, either. Embark on a weather-proof Halloween experience.
We’ve set up a magical trick-or-treat trail, games and activities for the whole family, a spooky Howl-o-Ween house, and a witch’s lair deep inside the haunted north woods. Be sure to read our Paw Pledge before your stay. There, you’ll find important information on how we’ve committed to keeping your family safe while you play!