Did you know that the word “dinosaur” comes from the Greek words dienos (which means “terrible”) and sauros (which means “lizard”)? Or that the largest dinosaurs out there just ate plants? How about the fact that scientists only began to give official names to dinosaurs starting in 1824, or that a person who studies dinosaurs is called a paleontologist?
There are tons of things to learn about these amazing creatures! Put on your hard hat and grab your digging tools, because we’re going to find some dinosaur bones!
Let the kids release their energy in a healthy way with this fun excavation activity. You can even use the opportunity to explore related subjects, including anatomy, anthropology and geology!
What will you find in your explorations? Maybe a big T-Rex? Or a large rock? Check out the instructions below to get started.
Supplies:
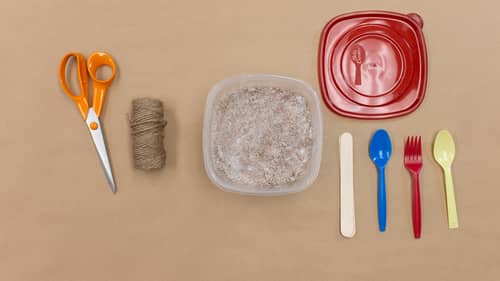
- Twine
- Scissors
- Plastic Spoons
- Metal Spoon
- Plastic Fork
- Popsicle Sticks
- Plastic Dinosaur Skeletons Toys
- 2 Cups of Sand
- 1 Cup of Plaster
- ½ Cup of Water
- Plastic Storage Container
- Mixing Bowl
- Rocks, Pebbles
Time to Craft: 15 minutes

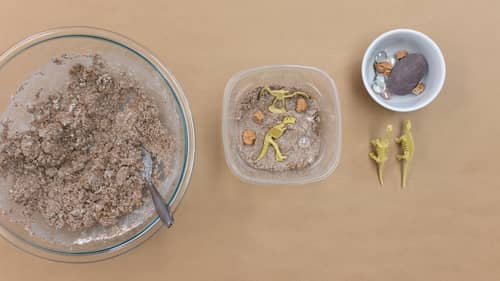
Step 1: Mix together in a bowl the sand, water, and plaster.
Step 2: Scoop a few spoonfuls of the sand mixture into a small bowl. Pack it down with the spoon.
Step 3: Place the plastic dinosaur toys on top of the sand mixture. Add pebbles, rocks, and stones with the dinosaurs.
Step 4: Scoop another layer of the mixture and place it on top of the plastic dinosaur figures and rocks until covered.

Step 5: Pat the sand mixture down to bury the dinosaurs.
Step 6: Leave the storage container lid off and let dry until the mixture is hardened. To speed up dry time, place in the sun.
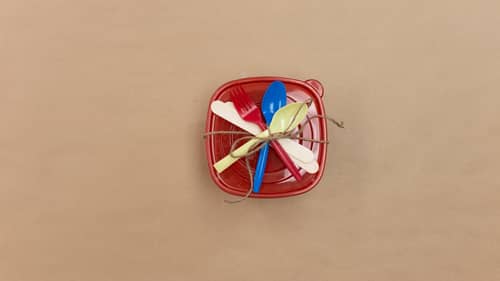
Step 7: Once the sand mixture is dry, place the lid on the storage container and tie the popsicle sticks and spoons to the lid with twine for easy carry to your excavation site!
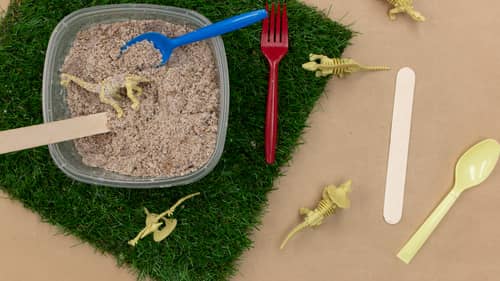
Step 8: When you’re ready to play, use popsicle sticks and plastic spoons to excavate your dinosaur bones! What will you discover?
We hope you had a blast making your very own dinosaur excavation game! Visit us again soon for more ideas on how to have fun at home with the family during your eLearning recess break. If you’re curious about visiting Great Wolf Lodge, be sure to read our Paw Pledge. We’re committed to keeping your family safe while you play!
Created by CraftBoxGirls.com / @craftboxgirls