These days, many of us are focused on maintaining a proper eLearning environment for the kids. That means staying on top of school schedules, learning hacks, homework assignments and more. Of course, just as important as what we do in front of the screen is how we spend our time away from it.
Engaging in a little musical exploration during recess can help encourage interest and engagement with new materials once back in class. To help bring a little rhythm into your at-home learning environment, we teamed up with DIY master and craftswoman extraordinaire Lynn Lilly.
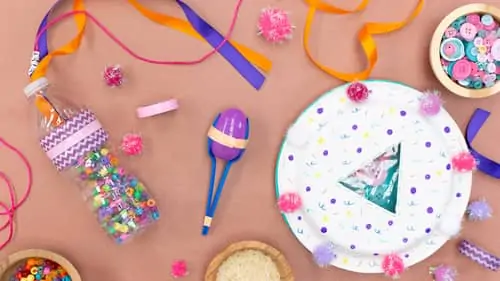
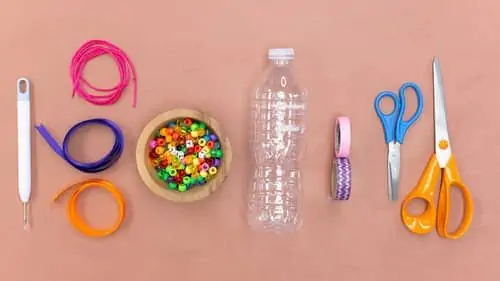
Make music with these fun, easy instruments using things around the house. With a little decorative tape and imagination, you can turn paper plates into a tambourine, a little bit of rice into maracas, and an empty water bottle into a rainmaker. You can even start a family band with these everyday items.
We recommend diving into this this activity during the weekend or sometime school is not in session. Store them somewhere safe and revisit them during a recess break or after school!
Tambourine:
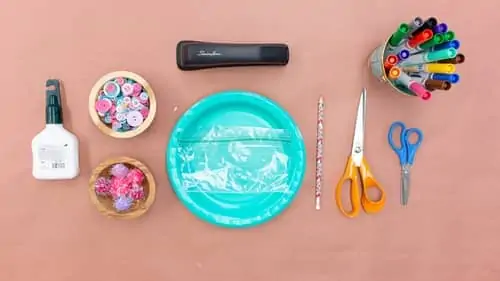
Supplies:
- Buttons
- Pom-Poms
- Liquid Glue
- Paper Plates
- Scissors
- Pencil
- Plastic Bag
- Markers
- Stapler
Time to Craft: 10 minutes
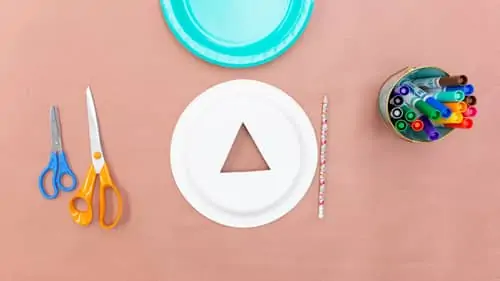
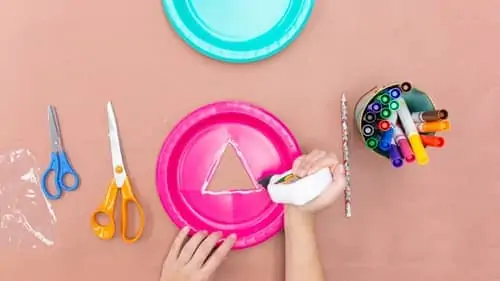
Step 1: Fold the paper plate in half. Draw a triangle in the middle of the plate with your pencil. Cut the triangle out of the plate so that you have a triangle shape in the middle of the plate.
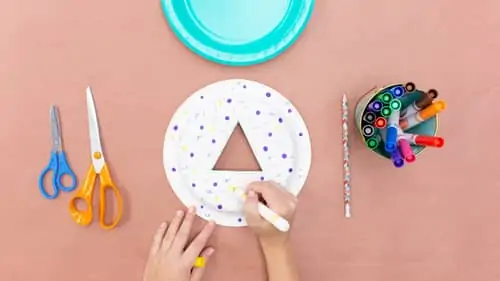
Step 2: Decorate the paper plate with markers. Create your own design. You can see how Lynn Lilly decorated her paper plate with polka dots, squiggles, and shapes below!
Step 3: Carefully cut the plastic bag in two halves. Take one of the halves and place it over the inside of the open triangle in the middle of the paper plate. Glue in place. Set this paper plate aside for now.
Step 4: Fill your other paper plate with buttons. You can add as many or as few as you like. Make sure you leave enough space so that the buttons can move and make music.
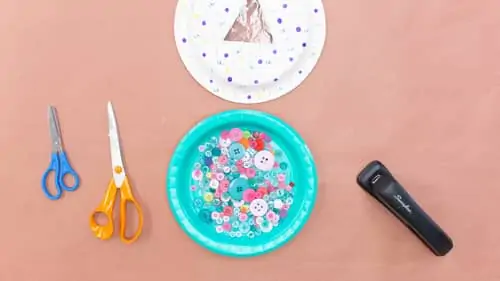
Step 5: Staple together the buttons paper plate with the triangle paper plate. Be sure the buttons are inside the two paper plates so they can make music.
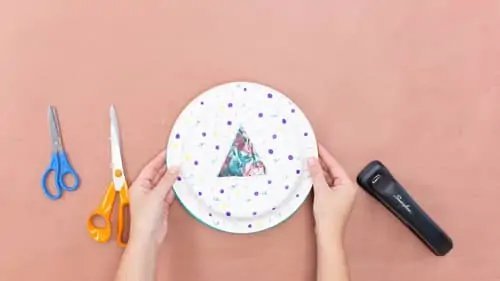
Step 6: Decorate the outside by gluing on pom-poms!
Maracas:
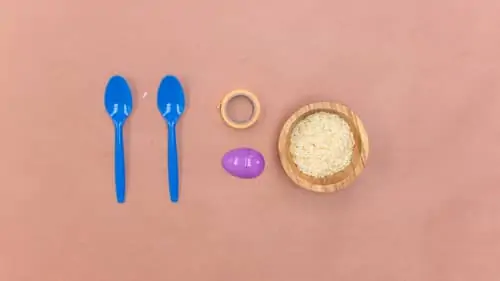
Supplies:
- Two Plastic Spoons
- Plastic Egg
- Decorative Tape
- A tablespoon of rice
Time to Craft: 10 minutes
Step 1: Add a tablespoon of rice to the plastic egg.
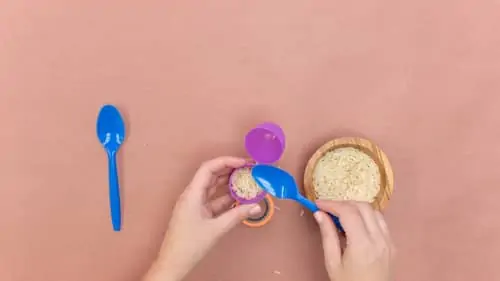
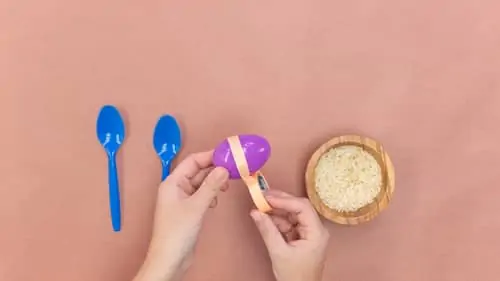
Step 2: Wrap and secure the rice in the plastic egg with the tape.
Step 3: Face the two plastic spoons towards the egg.
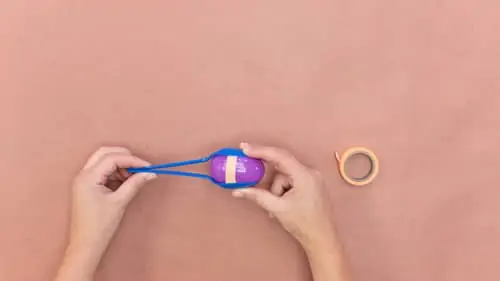
Step 4: Wrap and secure the two spoons to the egg with the tape.
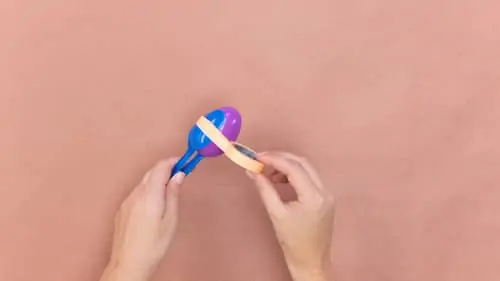
Step 5: Tape the ends of the spoons to secure.
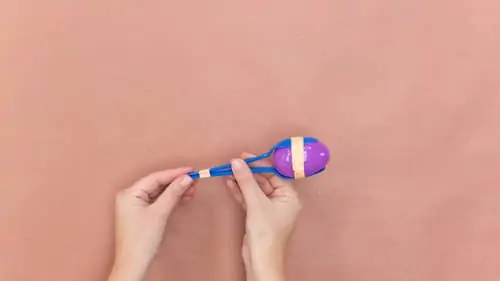
Step 6: Shake your maracas!
Rainmaker:
Supplies:
- Plastic Beads
- Empty Plastic Disposable Drink Bottle
- Decorative Tape
- Scissors
- Ribbon
- Embroidery Floss
- Sharp Hole Puncher
Time to Craft: 10 minutes
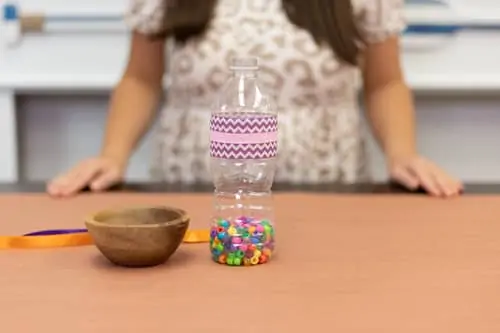
Step 1: Wrap and decorate your plastic water bottle with decorative tape. You can use as many colors as you like. Lynn Lilly decided to use two different types of decorative tape.
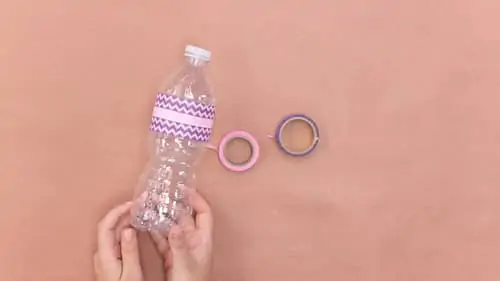
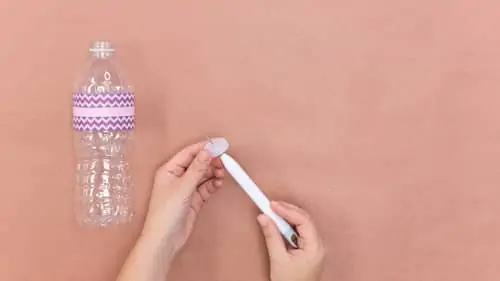
Step 2: Carefully poke a hole into the top of the plastic bottle using a sharp hole puncher. *Ask an adult to help with this step
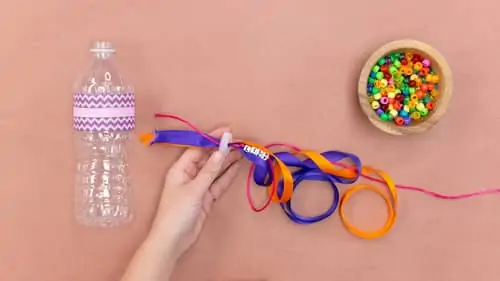
Step 3: String plastic beads along embroidery floss. You can see Lynn Lilly spelled out the name of a friend, Lily! You can spell your own name if you like.

Step 4: Thread the embroidery floss and ribbon into the hole in the plastic water bottle top. Tie the ends into a knot on the inside of the top.
Step 5: Add plastic beads into the empty water bottle.
Step 6: Screw the bottle top to the bottle and gently shake to mimic the sound of rain. We love the sound of any kind of water!
We hope you had a blast making your very own instruments with Lynn Lilly! Visit us again soon for more ideas on how to have fun at home with the family during your eLearning recess break. If you’re curious about visiting Great Wolf Lodge, be sure to read our Paw Pledge. We’re committed to keeping your family safe while you play!
Created by CraftBoxGirls.com / @craftboxgirls