If you’re looking for a fun indoor activity that won’t leave your kitchen table looking like an artist’s studio, kids origami projects are the answer. This ancient art of folding paper into shapes is the perfect craft for when you want to boost your child’s brain power and imagination, but you’re short on supplies, and not in the mood to make a mess.
We like making easy origami animals to help children get excited about upcoming events. Like a sailboat for that summer trip, a monkey before a visit to the zoo, or wolf paws for your upcoming Great Wolf Lodge vacation.
That’s why we’ve created this step-by-step tutorial to show you how to make a wolf paw your children will love. Pair it with this wolf face simple origami for kids design [link to other origami post] and you’ll be ready for your next Great Wolf Lodge adventure.
Origami Animal Instructions:
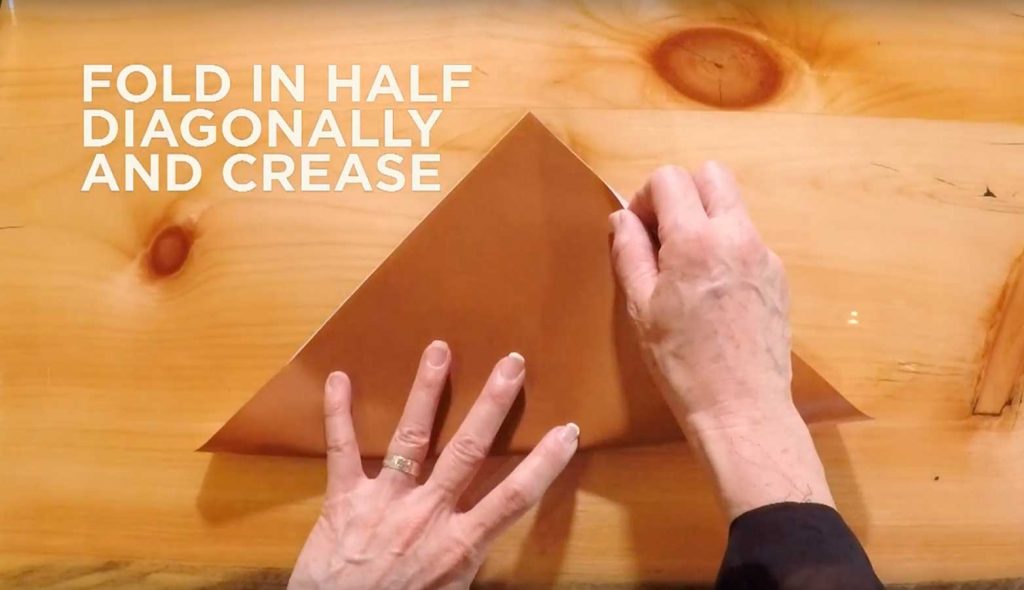
Step 1: How to make origami out of paper starts with cutting a piece of construction paper into a square. We recommend brown or grey if you’re looking for classic wolf colors. Then, clear a flat surface so you have a space to fold.
Step 2: Have your child fold the paper in half diagonally and crease. Rotate clockwise, fold the paper in half diagonally, and crease again.
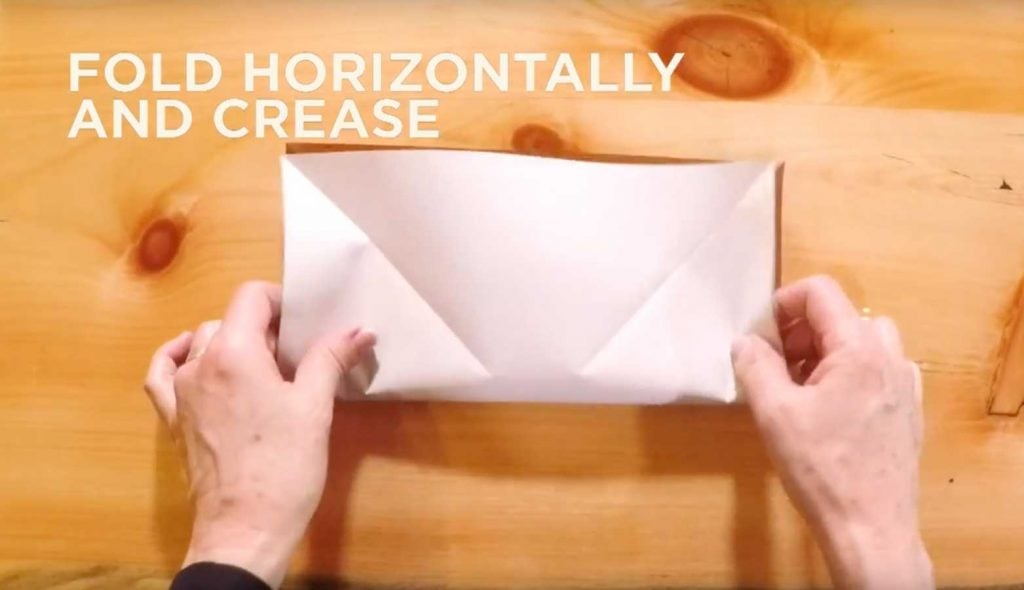
Step 3: Have your child unfold the paper and flip over.
Step 4: Fold horizontally and crease. Unfold and rotate clockwise.
Step 5: Fold horizontally and crease again.
Step 6: Unfold and bend the edges slightly under so the center of the paper creates a peak.

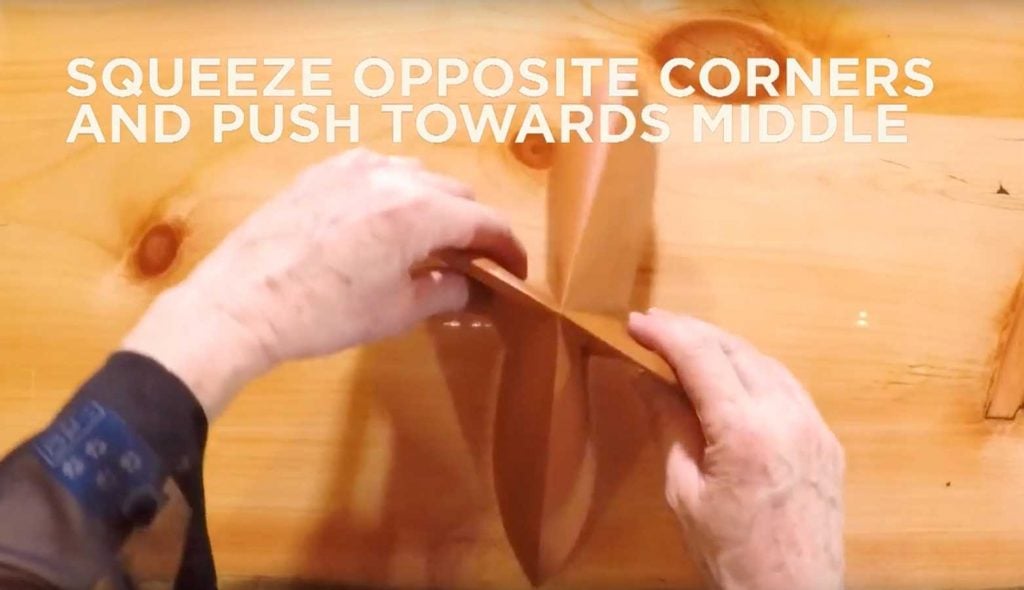
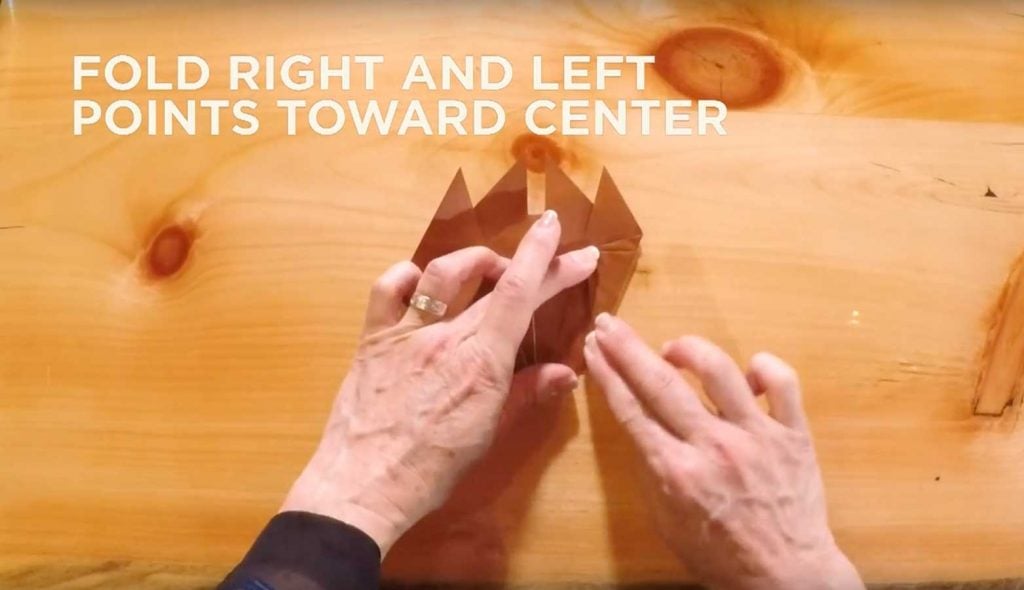
Step 7: Squeeze the opposite corners towards the middle and fold into a triangle. The point of the triangle should be facing up.
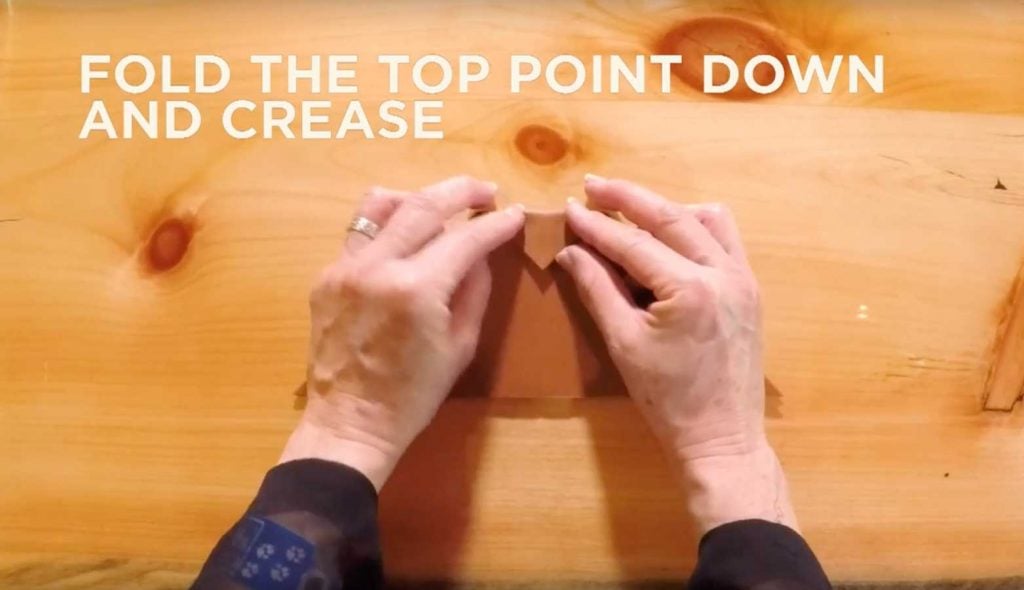
Step 8: Have your child fold the tip of the triangle down about an inch and crease.
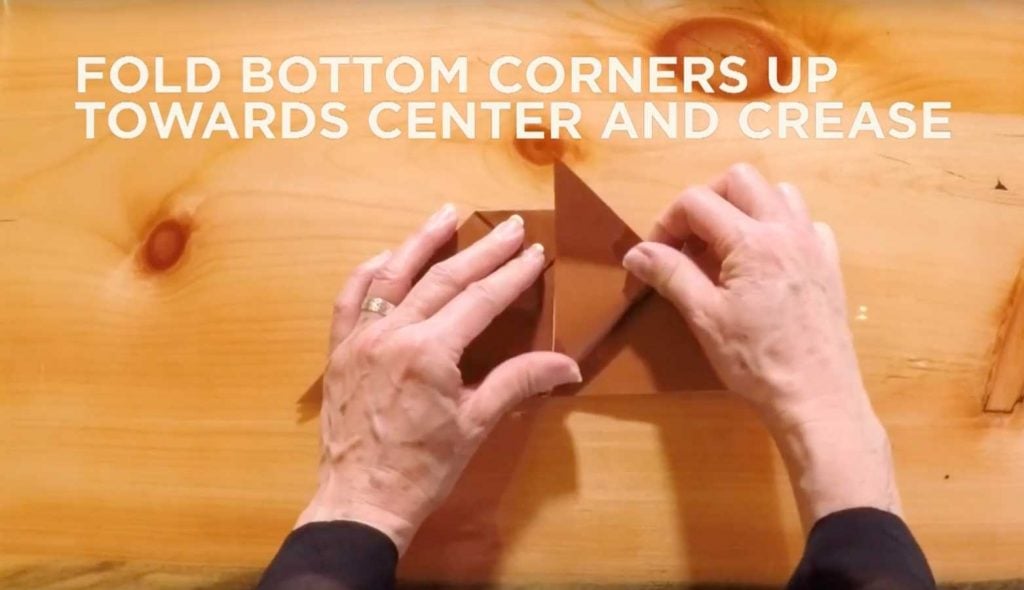
Step 9: Have your child fold the top paper of the bottom corner up so it’s level with the center line. Crease and repeat on the other side.
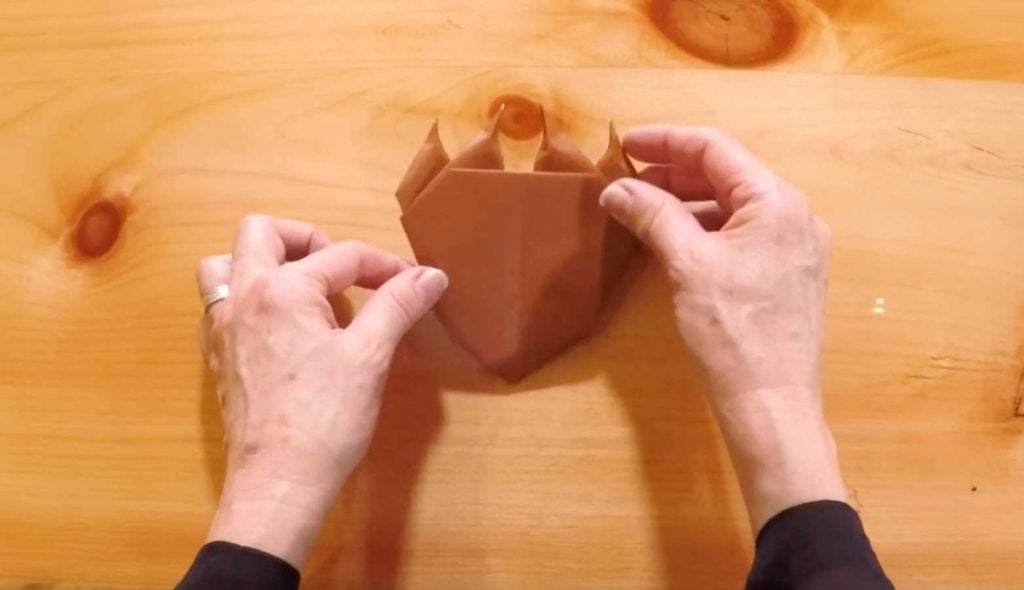
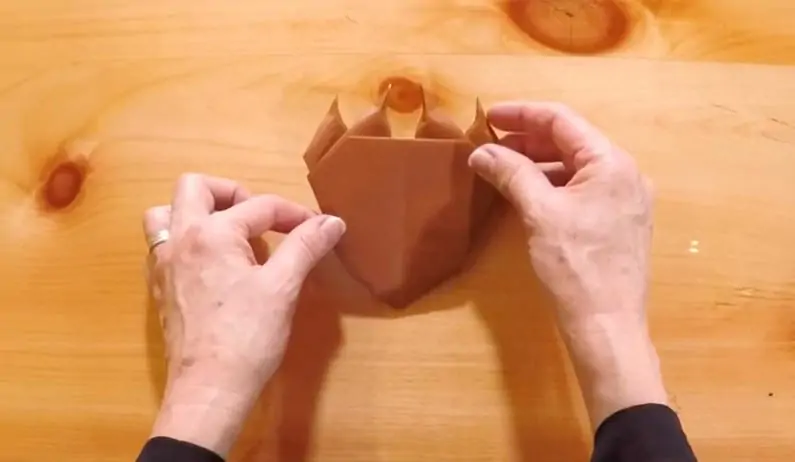
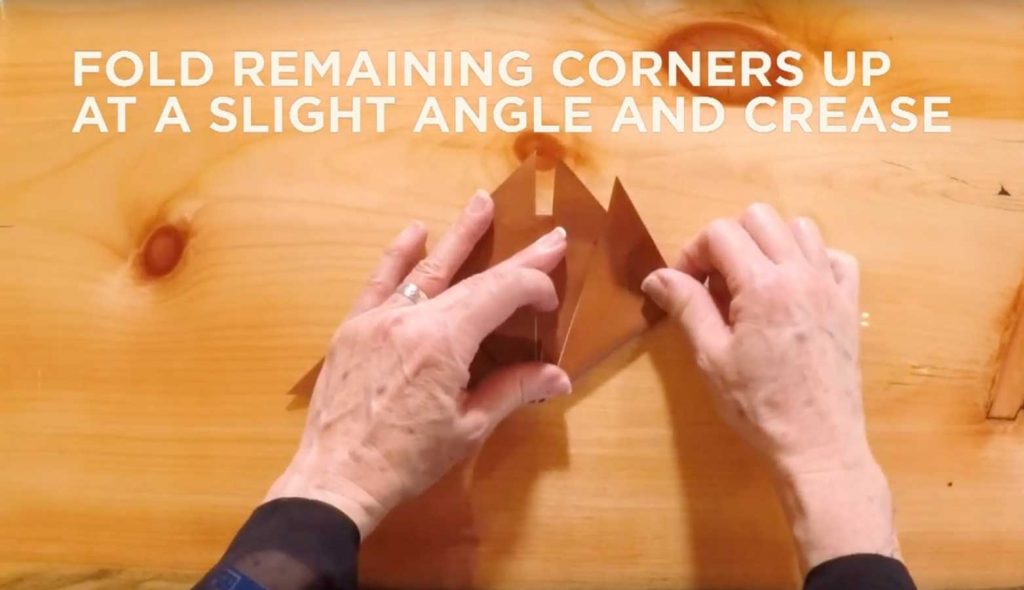
Step 10: Fold the remaining corners up and out at an angle so they are slightly wider than the previous ones. The key is to make some space between the triangle points to make the wolf’s toes.
Step 11: Now, fold the tips of the outer triangles in slightly (about a quarter of an inch). Even easy origami sometimes can have some tricky parts, so we recommend that a parent complete this part.
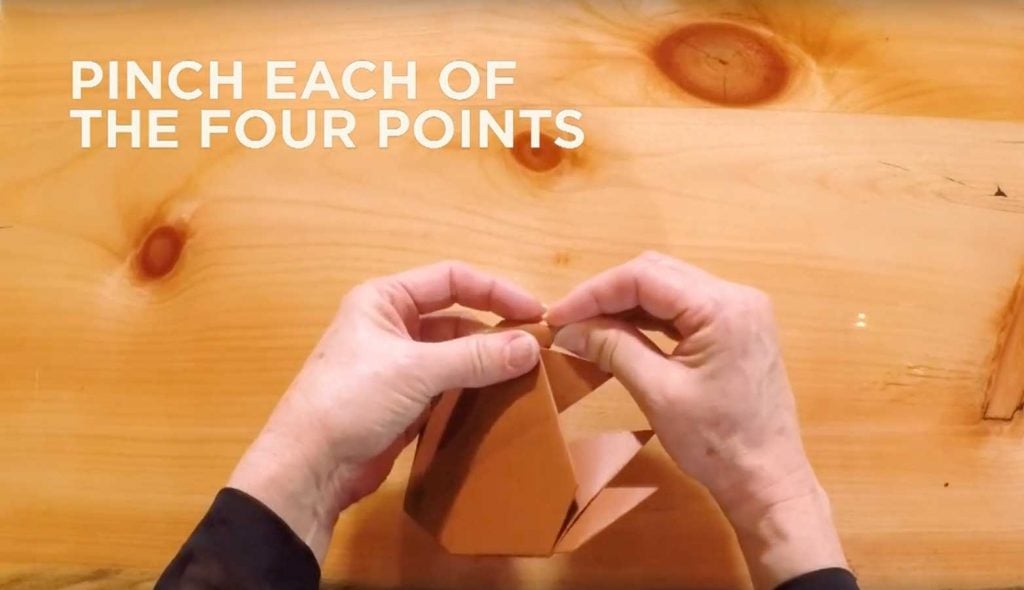
Step 12: A wolf’s nails are longer and sharper than ours, so we’ll need to pinch each of the four four points (or toes!) together to make them look more wolf-like.
And voila! You have your very own Wiley the Wolf paw. Now, let your child use it to high five you, because you just made a super easy origami animal that’s ready to hit the road with you on your next trip. And for your next origami project, try making a wolf face!